This tutorial will show you how to create a WordPress grid gallery with category filter.
You can add images, YouTube, Vimeo, HTML5 videos, PDF documents, WordPress posts, custom HTML code to the gallery, define multiple categories, add category buttons or selection to the gallery and create a WordPress gallery with category filter.
You can check the demo created with this tutorial at WordPress gallery with category filter. You can click the top buttons to filter categories.
There are five steps in this tutorial:
- Step 1 - Install Wonder Grid Gallery
- Step 2 - Create categories
- Step 3 - Add Images and Videos to the WordPress gallery
- Step 4 - Show category filter buttons or selection
- Step 5 - Publish the WordPress gallery and add the gallery shortcode to the WordPress post or page
Step 1 - Install Wonder Grid Gallery
First please install the plugin Wonder Grid Gallery. You can download the free version from the product home page, test it, make sure it working for you before upgrading to the commercial version.
Step 2 - Create categories
In the plugin Wonder Grid Gallery, create a new gallery or edit an existing gallery. In the General Options section, click the link Add Category.
Step 3 - Add Images and Videos to the WordPress gallery
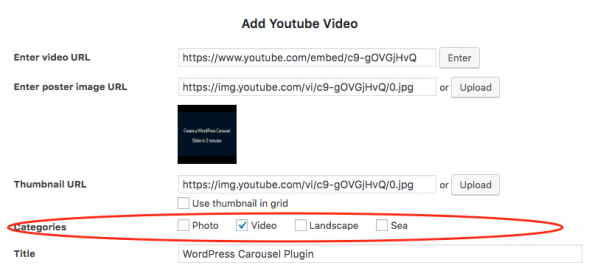
In the plugin, step 1 Images & Videos tab, add an image or video, the categories you added in the above step will be listed in the Add Image or Add Video dialog.
Step 4 - Show category filter buttons or selection
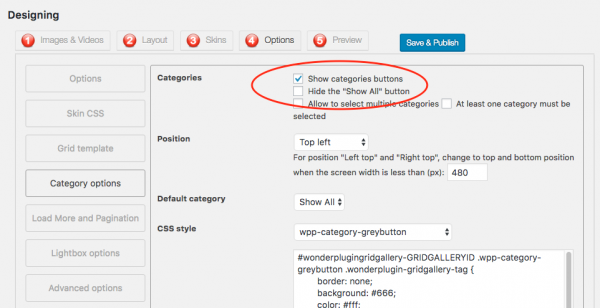
In the plugin, step 4 Options tab, Category Options, check the option "Show categories buttons". In the CSS style dropdown list, you can choose to display the category filter as buttons or dropdown selection.
Step 5 - Publish the WordPress gallery and add the gallery shortcode to the WordPress post or page
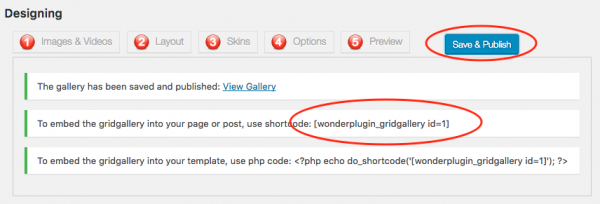
Click the button Save and Publish, then copy the generated shortcode to your WordPress post or page. You can check the demo at WordPress gallery with category filter.


