How to add WordPress Lightbox in Beaver Builder
After the plugin Wonder Lightbox is installed and activated, adding a class name wplightbox to any link will activate the lightbox effect.
This tutorial will guide you how to add the class name to links in the Beaver Builder and enable the lightbox effect. You can use the lightbox to open an image, HTML5 video, YouTube video, Vimeo video, PDF, webpage or div content.
Before following this tutorial, make sure you have installed and activated the premium plugin Wonder Lightbox. You can download the trial version from the product homepage, test it, make sure it works for you before upgrading to the Pro version.
Add Lightbox to Text in Beaver Builder
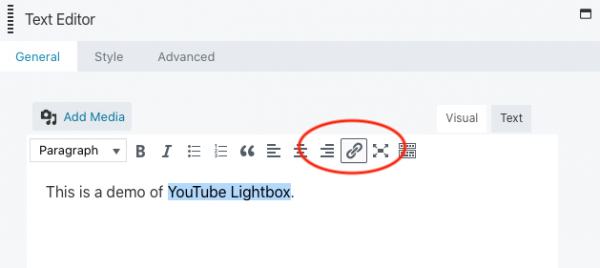
In Beaver Builder, edit the Text Editor module, drag and select the text, then click the link button.
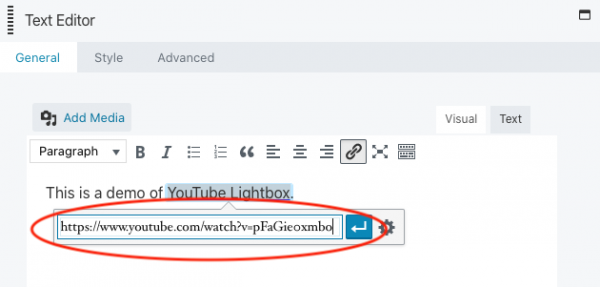
In the popup dialog, enter the image or video URL that you want to open in the lightbox.
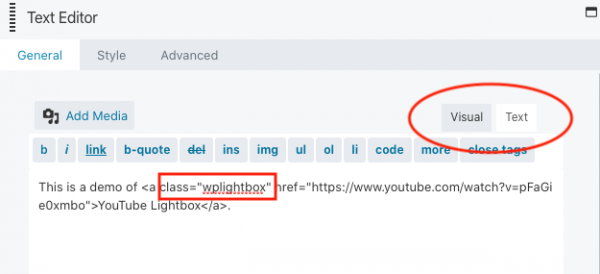
In the Text Editor, click the Text tab on the top right corner, then add class="wplightbox" to the a tag of the link.
Update the page and test the lightbox effect in the published page. The lightbox effect will not work in the page builder itself.
Add Lightbox to an Image in Beaver Builder
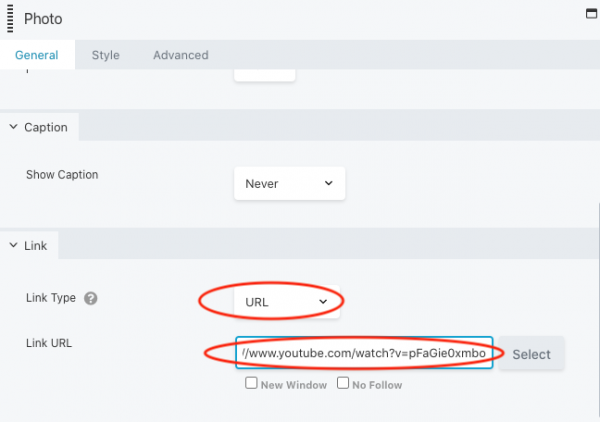
In Beaver Builder, add a Photo module and select an image file. In the bottom Link section, select URL from the Link Type drop down list and enter the lightbox image or video URL to the Link URL input box.
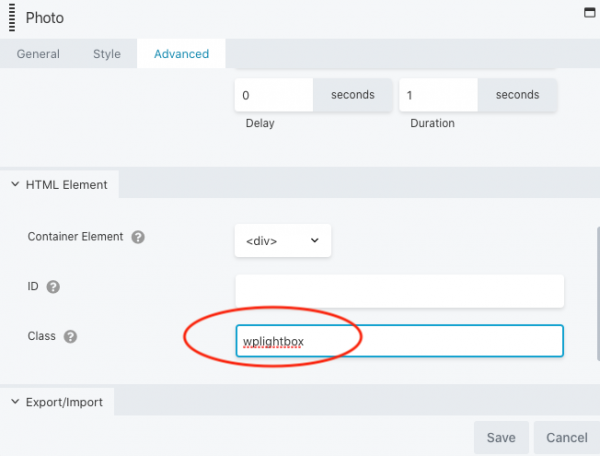
Go to the Advanced tab, HTML Element section, enter wplightbox to the Class input box.
Save the page and test the lightbox effect in the published web page.
Add Lightbox to a Button in Beaver Builder
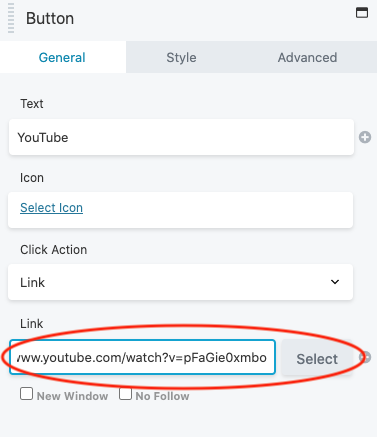
In Beaver Builder, add a Button module. In the Button dialog, enter the lightbox image or video URL to the Link input box.
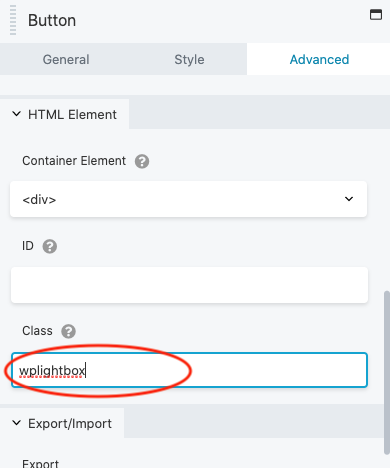
Go to the Advanced tab, HTML Element section, enter wplightbox to the Class input box.
Publish the page and test the lightbox effect in the published web page.
