This tutorial will guide you through the process of manually upgrading the plugin to a newer version. You can use these instructions to upgrade from the Free version to the Pro version or to update either version to the latest release.
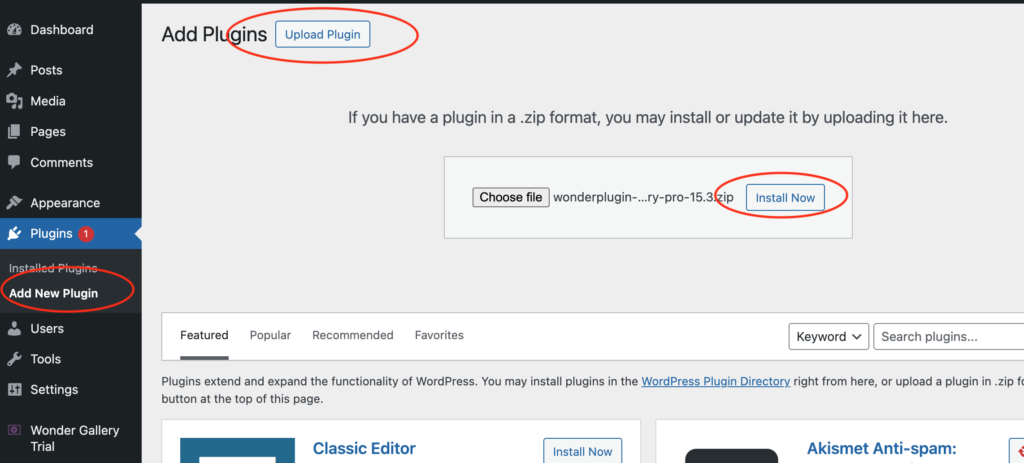
In your WordPress backend, navigate to the left menu: Plugins -> Add New Plugin. Click the Upload Plugin button, select the downloaded plugin .zip file, and then click the Install Now button.
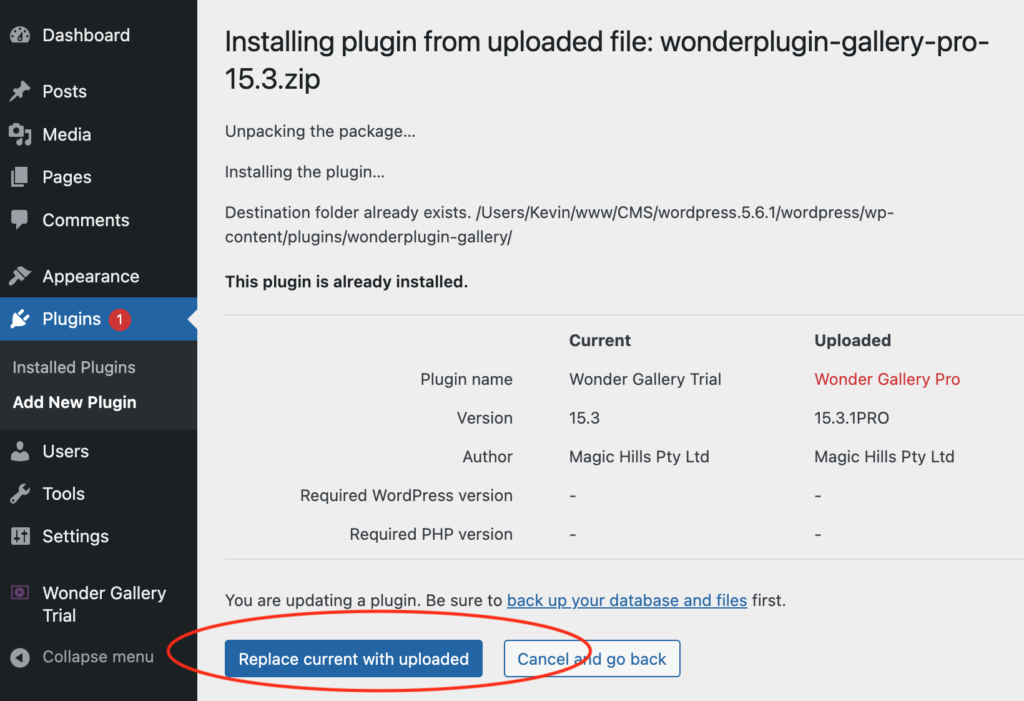
On the next page, click the Replace current with uploaded button and wait for WordPress to complete the installation. The plugin will be upgraded to the Pro version once the installation is finished.
Clear WordPress Caches
If you have installed a WordPress JS/CSS minify plugin or a WordPress cache plugin (e.g., Autoptimize, W3 Total Cache, WP Rocket, WP Fastest Cache, WP Super Cache), make sure to empty all caches created by these plugins.
Additionally, some web hosts (e.g., GoDaddy, WPEngine, SiteGround, DreamHost) also cache web files. You need to clear the web hosting caches before testing. Contact your web hosting provider for guidance on clearing these caches.
Finally, clear your web browser's cache before testing.


