This tutorial will guide you how to add quick view buttons to the products in your WooCommerce store. You can add the button on top of the product image, show the button persistently or only on mouse hover. You can also add the button before or after the product name or the Add to Cart button.
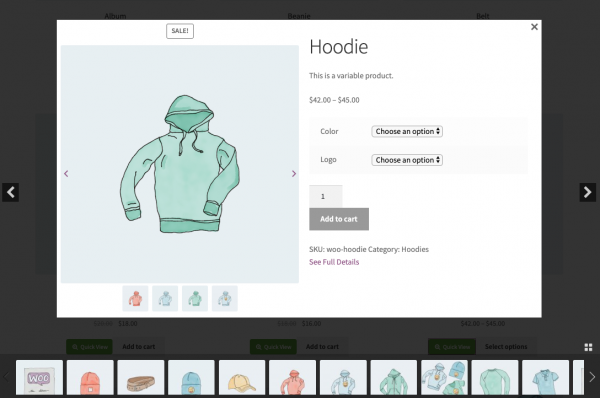
When clicked, the quick view button will display the product details in a quick view lightbox. Customers can quickly view product details, check product options and add the product to the shopping cart via Ajax. If they want to go back shopping, they can simply close the lightbox or use the navigation arrows or products thumbnail carousel to navigate through other products.
There are 3 steps in this tutorial:
- Step 1 - Install WooCommerce Quick View Plugin
- Step 2 - Configure WooCommerce Quick View Button
- Step 3 - Configure WooCommerce Quick View Lightbox
You can check the online demo at WooCommerce Quick View Demo.
Problem and Solution: Benefit of Adding WooCommerce Quick View
Before getting started, we will discuss the problem and the solution, the benefit of adding quick view buttons to your WooCommerce store.
When customers visit online stores, they generally like to quickly browse through all the products. If they find a product of interest, they will click to view the details of the product.
For traditional online stores, if customers want to view the details of the product, they need to enter the product page, after that, if they want to see other products, they need to go back to the shop page again.
After several times back and forth between the shop page and the product pages, customers may forget which products they have viewed and miss the products they are looking for. Moreover, it takes time to load each product page, which may cause the customer losing interest and eventually leave your store.
This problem can be fixed by adding quick view buttons to the WooCommerce shop page. By adding quick view buttons to the shop page, customers can quickly view product details without leaving the shop page which will provide a much better shopping experience.
Step 1 - Install WooCommerce Quick View Plugin
First please install the premium WooCommerce Quick View Plugin. You can download the trial version from the plugin home page, try it, make sure it works for you before upgrading to the pro version.
For how to install the downloaded plugin zip file, please view the tutorial: How to install a WordPress plugin from a ZIP file.
Step 2 - Configure WooCommerce Quick View Button
After you install and activate the WooCommerce Quick View Plugin, it will add a quick view button to products in the WooCommerce shop page.
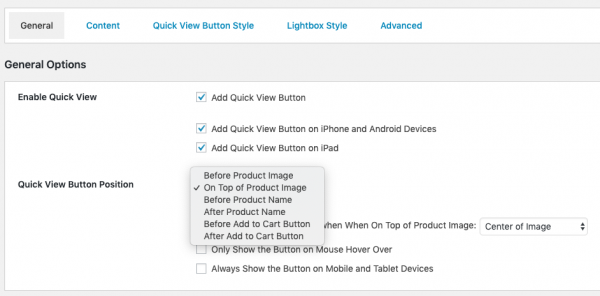
In your WordPress dashboard, left menu, goto Wonder WooCommerce -> Quick View. In the General tab, you can choose a position for the Quick View button.
When the button is placed on top of the product image, you can configure to always show the button or only show it on mouse hover.
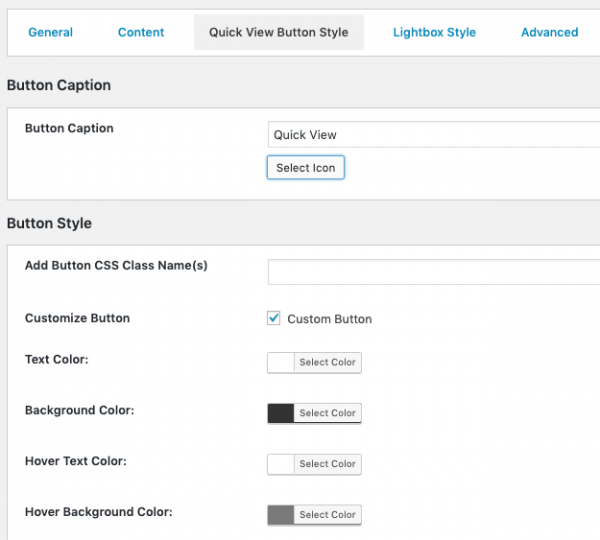
In the Quick View Button style, you can enter text for the button caption, define text color, background color, color on hover etc.
You can also add an icon to the button caption.
Step 3 - Configure WooCommerce Quick View Lightbox
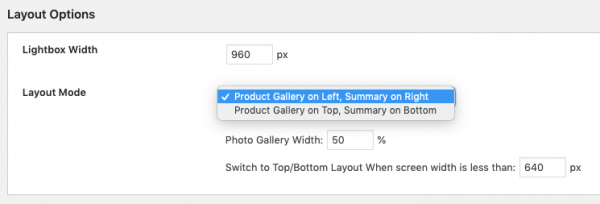
In the General tab, Layout Options, you can define the width of the quick view lightbox, select a layout mode and define the width of the photo gallery.
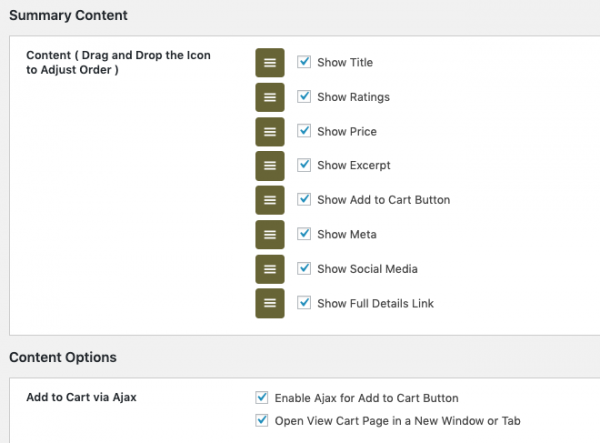
In the Content tab, you can define which content to show in the quick view lightbox.
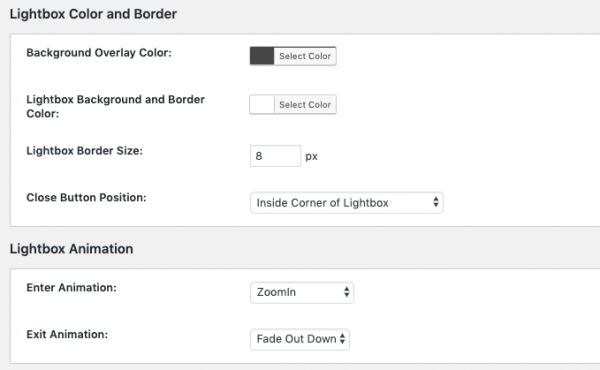
In the Lightbox Style tab, , you can define the lightbox color, background color, add enter and exit animation for the popup.
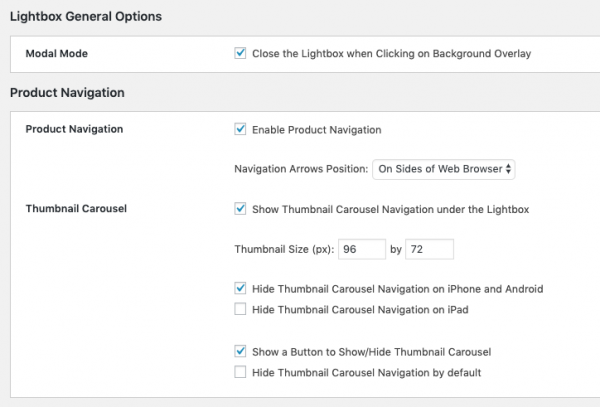
In the Lightbox Style tab, you can also enable product navigation for the lightbox. You can add navigation arrows in the lightbox popup so the customer can directly navigate to other products without closing the lightbox.
You can also display a products thumbnail carousel under the lightbox, so the customer can directly browse all products on the shop page and quickly view the product details.
